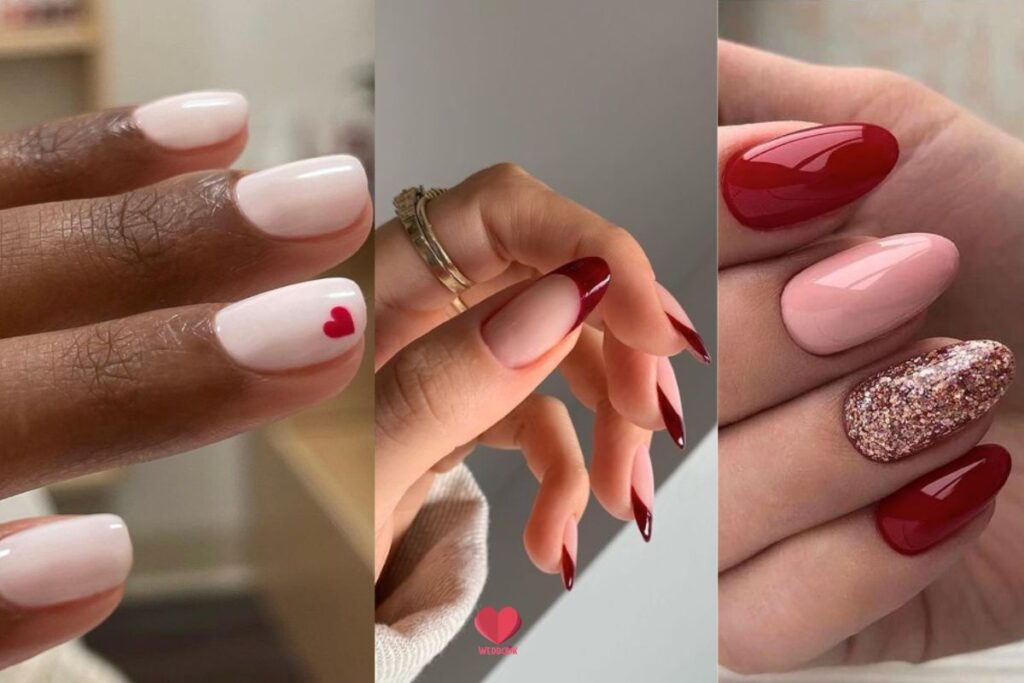
When you’re looking to DIY the manicure for V-Day, the dip nail designs for Valentine’s Day are the ideal option. Also called SNS manicures, the dip powder involves dipping the nails into a pigmented powder after applying an adhesive base and curing it with an activator liquid. This can be done on both natural nails and extensions. Below, find Valentine’s Day dip nail ideas and at the end, also find a guide on the Do’s and Don’ts of Dip Powder Nails to help you DIY this technique flawlessly.
Also See: 125 Valentine’s Day Nails Designs & Ideas For 2023
Dip Nail Designs For Valentine’s Day
#1 Valentine’s Day Dip Nails With Heart Block
These Valentine’s Day nails are comprised of lighter and darker shades of pink with a deep red shade to create a heart block in the middle. The easy DIY manicure is portrayed by the artist through a step-by-step tutorial which makes color-blocking with dip powder easy and fun.
#2 Nude Nails
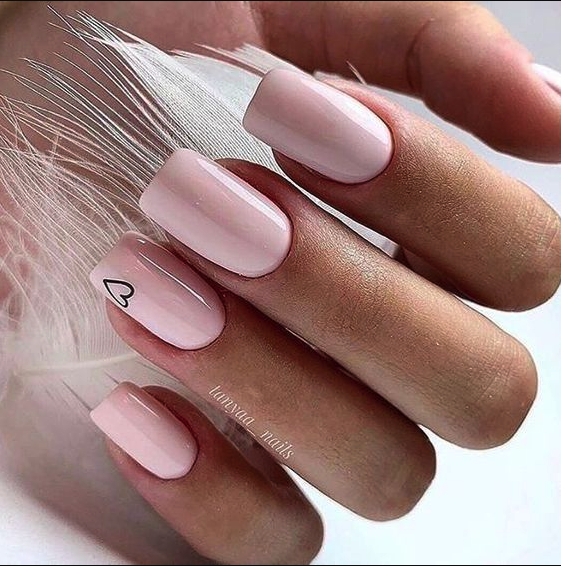
What an underrated romantic design! Love is calm and composed, and gives you peace like no other emotion. Here, the next one of the dip nail designs for Valentine’s Day brings this serenity of love to life with a blush pink base and a cute heart motif on the ring finger for minimalistic and elegant nail art.
Buy This Set Here.
#3 Glitter Accent!
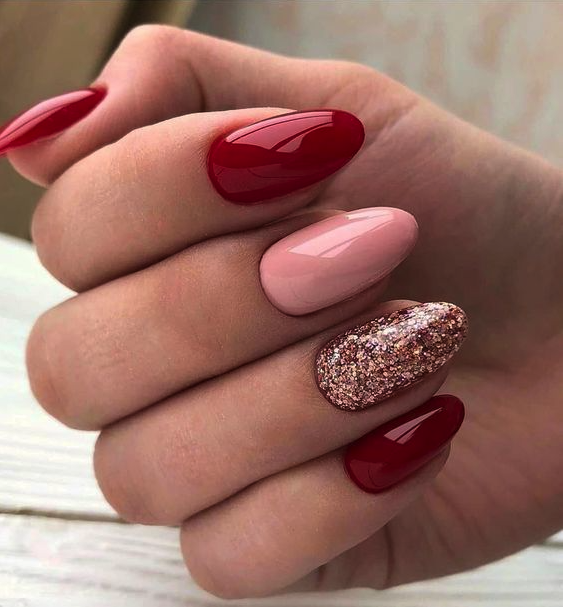
The combination of pink and red is found in abundance in Valentine’s Day nail designs, and rightfully so! The hues are associated with passion, romance, and affection, and including them evokes a sense of warmth and sweetness, which makes them a hit in V-Day elements, like nail art. Explore their eye-catching and vibrant attribute with the next one of the dip nail designs for Valentine’s Day.
Buy Glitter Dip Nail Powder Here.
#4 Red Valentine’s Day Nails
Few shades are more striking than blood red. It immediately grabs attention and is commonly associated with passion, sexuality, love, and joy, which are the exact feelings V-Day also evokes. A blood-red dip manicure stands out on its own or can be complemented with silver glitter for an elevated look.
#5 Charming Red
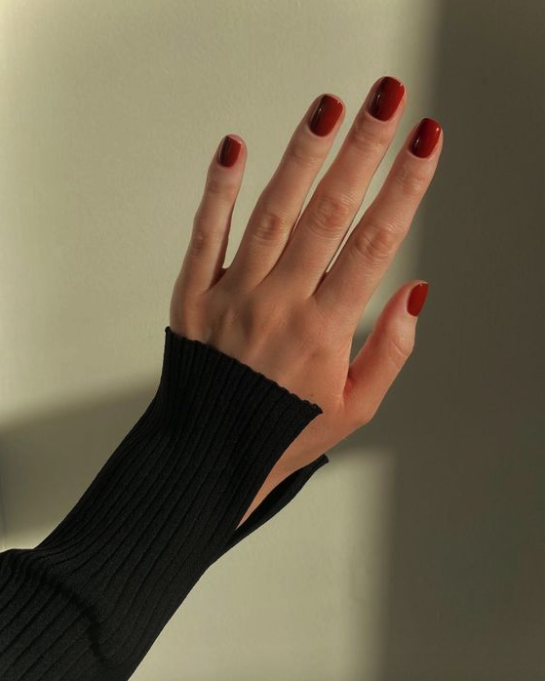
If you’re new to the world of DIY manicures, and dip powder nails, keep it simple yet unique. Choose a unique shade of red and paint all your nails in them. These can be done on your natural nails or you can use acrylic false nails set for a longer length.
Try this unique burgundy dark red dip powder color here.
#6 The Signature Heart Motif
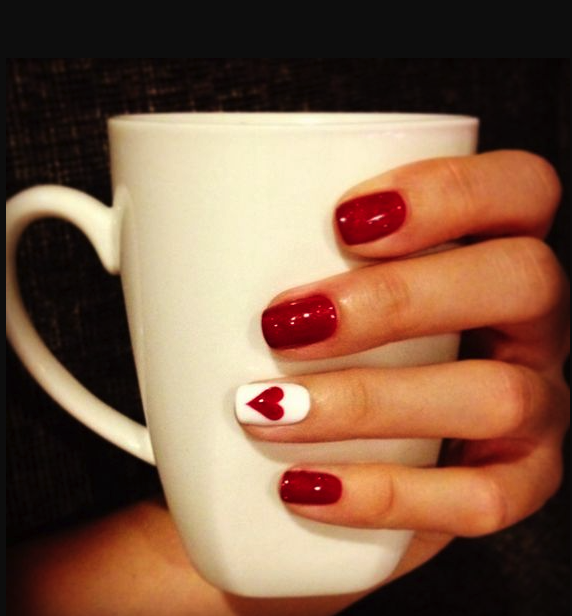
Pick a glossy red and white nail design, elevate the look, and align with the theme by adding a heart motif to one of the fingers. If you aren’t comfortable drawing the motif with the dip powder, you can also use heart stickers and a gloss coat on top to seal it all.
Find heart stickers here.
#7 Red French Manicure
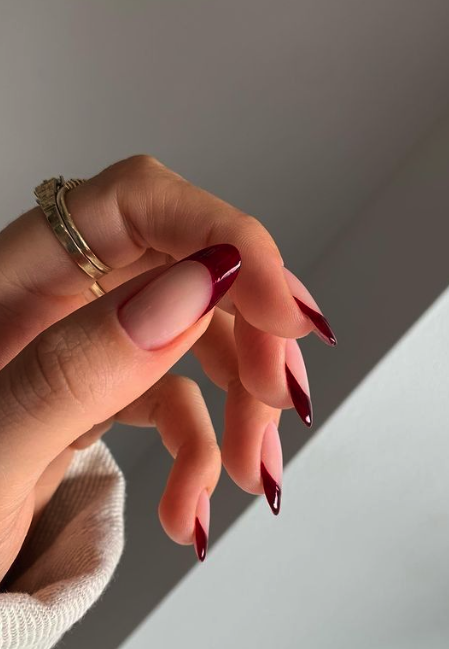
Valentine’s Day nails don’t have to be filled with hearts and vibrant colors to give an impression that you’re in love! Just look at these nude nails with red French tips fitting the occasion perfectly whilst giving you an everyday manicure to last for about 3 weeks or so!
#8 Peek-A-Boo Glitter Powder Nails
With dip powder nails, you can create as simple and as artistic of a design as you like. In the next one of the dip nail designs for Valentine’s Day, the glitter nails are done in Reverse French style with a soft pink base for a romantic and elegant look.
#9 Corals & Pinks, Enhanced With Patterns
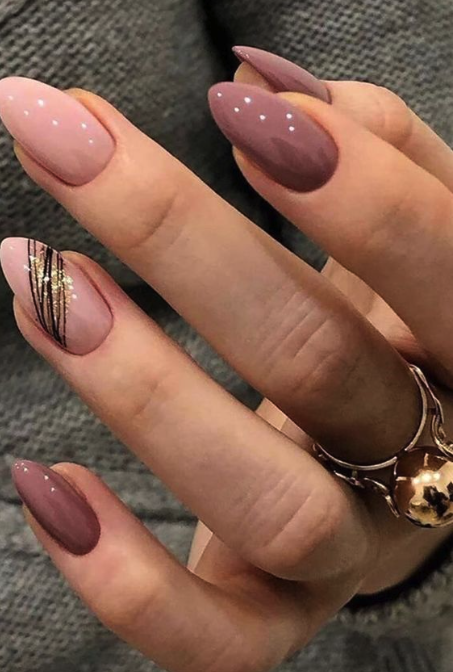
These pointed nails are done in shades of light and dark coral pink and are elevated with the use of geometric art on the ring finger. This art can be recreated using a dotting tool and drawing straight lines to and fro over the dip powder nail. You can choose to use the glitter powder on the bottom for a celebratory effect.
#10 Playing With Shades Of Red
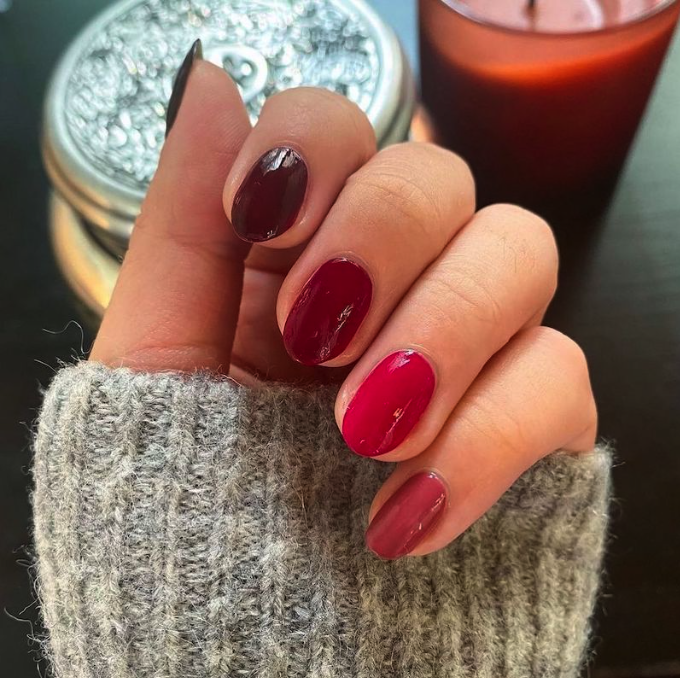
Red is THE color for Valentine’s Day. Keeping the same in mind, the next manicure design is all about employing these shades of red to create a stark manicure design. You can play with different hues to create nail art that’s truly your own.
For different shades of Red, purchase this dip manicure here.
#11 Purple Valentine’s Day Nail Designs
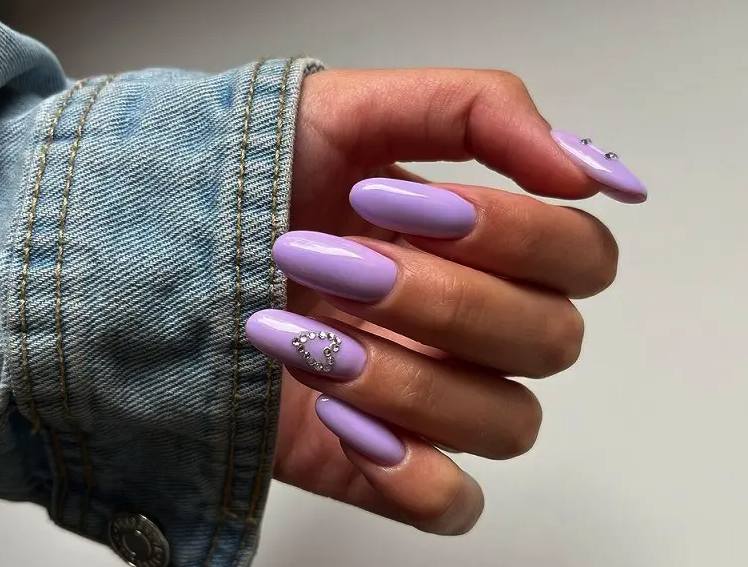
These purple Valentine’s Day nail designs are done on long, pointed nails, but you don’t necessarily have to have that length to bring out the beauty of this manicure. Small nails with a heart made of studs will have the same impact as this nail length. Further smaller nails are also easier to maintain and have a practical element which makes them a preferable option too!
#12 Sparkly Valentine’s Day Nails With Heart
Another step-by-step tutorial for dip nail designs for Valentine’s Day to help you create salon-style nails at home. This design features baby pink and glitter accent nails, along with one of the nails bedecked in a heart motif, signifying the celebrations of V-Day! Watch the full video below.
#13 Earthy Vibes
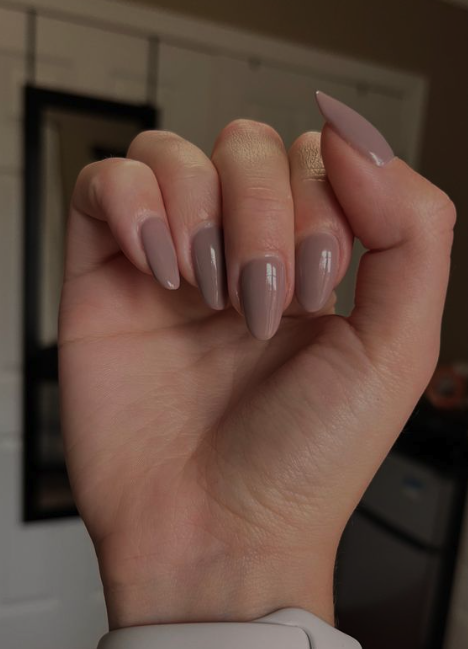
To stand out with your manicure, all you need sometimes is a distinctive shade. This earthy brown shade with a touch of gray is a gorgeous and striking hue to try as your V-Day manicure. Another benefit? It works on all nail shapes and you don’t have to disrupt the natural length of the nails to try this visually appealing manicure.
Find shades of nude dip powder colors here.
#14 A Hearty Design
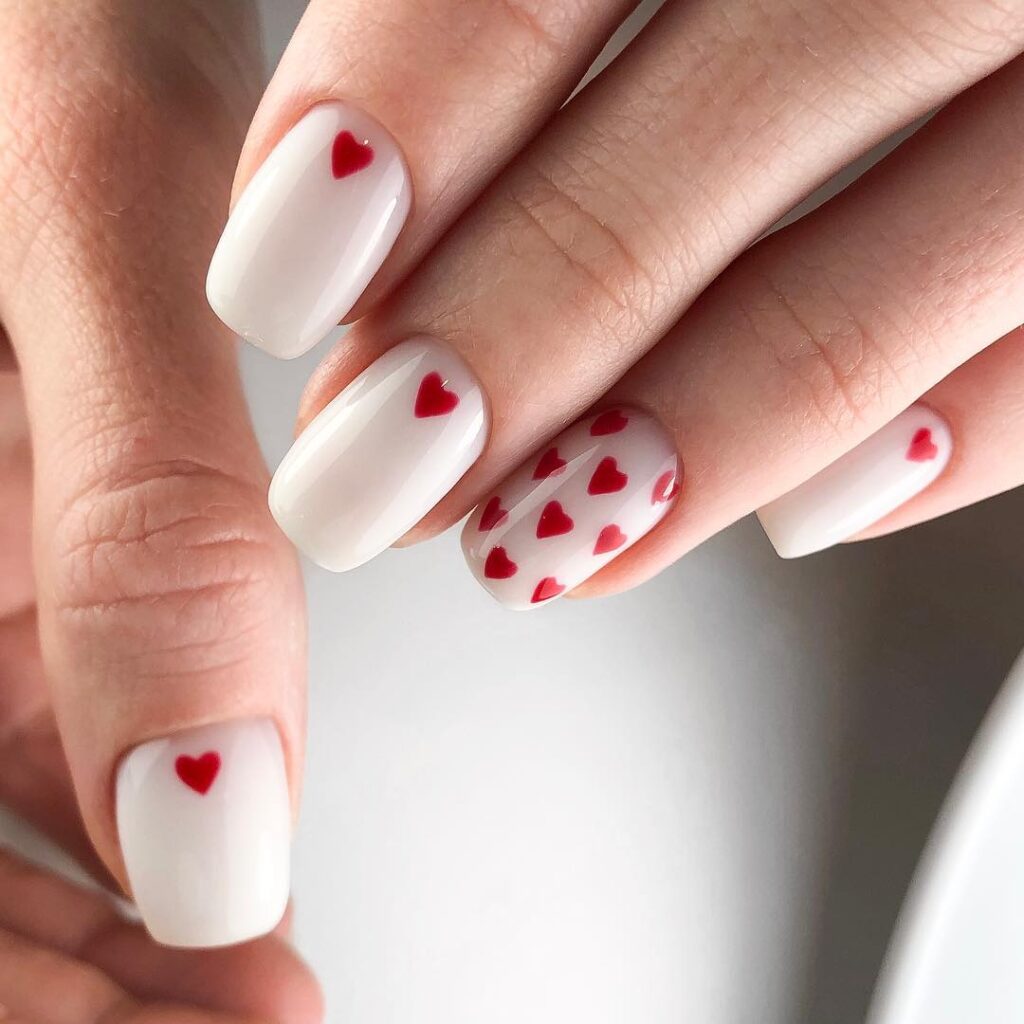
These white nails are enhanced with red hearts for a romantic and gorgeous Valentine’s Day dip nail manicure. It’s also very easy to DIY. All you need is translucent white dip nail powder. Apply it in 2 to 3 thin layers and use heart nail stickers before coating it all with gloss polish.
Find heart nail stickers here.
#15 Light Pink + Dark Pink
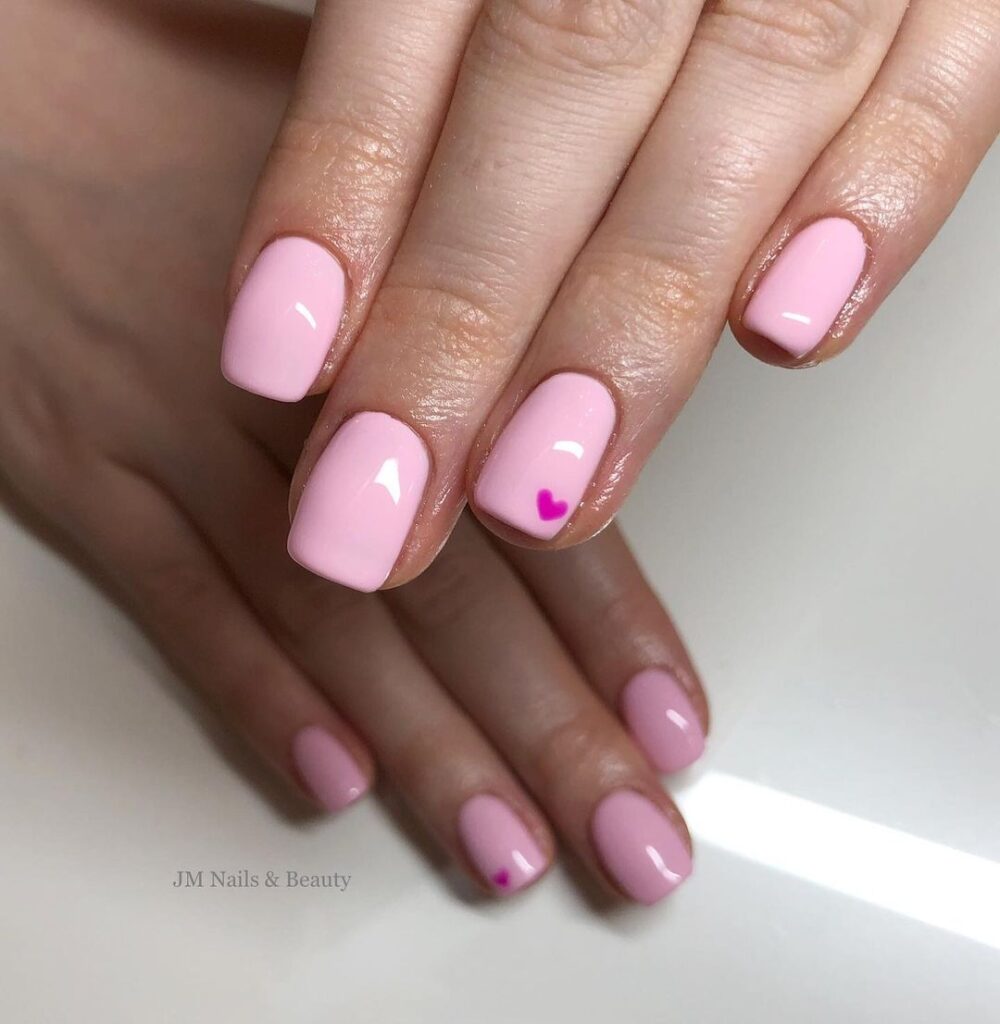
Celebrate Valentine’s with small baby pink nails adorned with delicate heart motifs. The soft, charming hue radiates sweetness, while the hearts add a touch of romance. This subtle and elegant nail design captures the essence of love, making it a perfect choice for a heartfelt and stylish Valentine’s Day look.
#16 Classic French Nails
The classic, elegant, and timeless French nail design suits about every occasion. Another advantage? They can be created with a professional touch in the comfort of your home, and a tutorial on how you can create classic French nails with dip powder is included below.
This Dip Powder set has both colors.
#17 Glitter Nail Accent
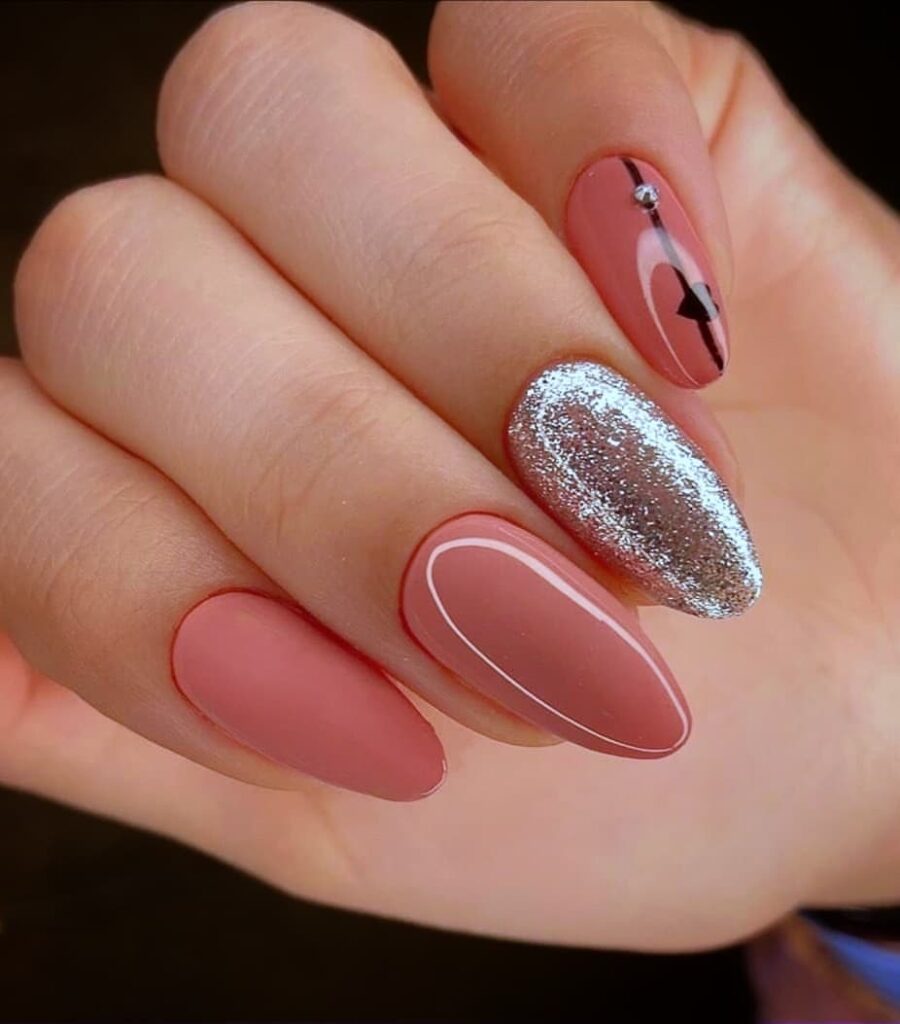
We love how this one of the nail designs for Valentine’s Day combines gloss, matte, and glitter manicures with a heart line for an ingenious design that fuses varied elements for a striking and gorgeous manicure.
#18 Beautiful Black Hearts
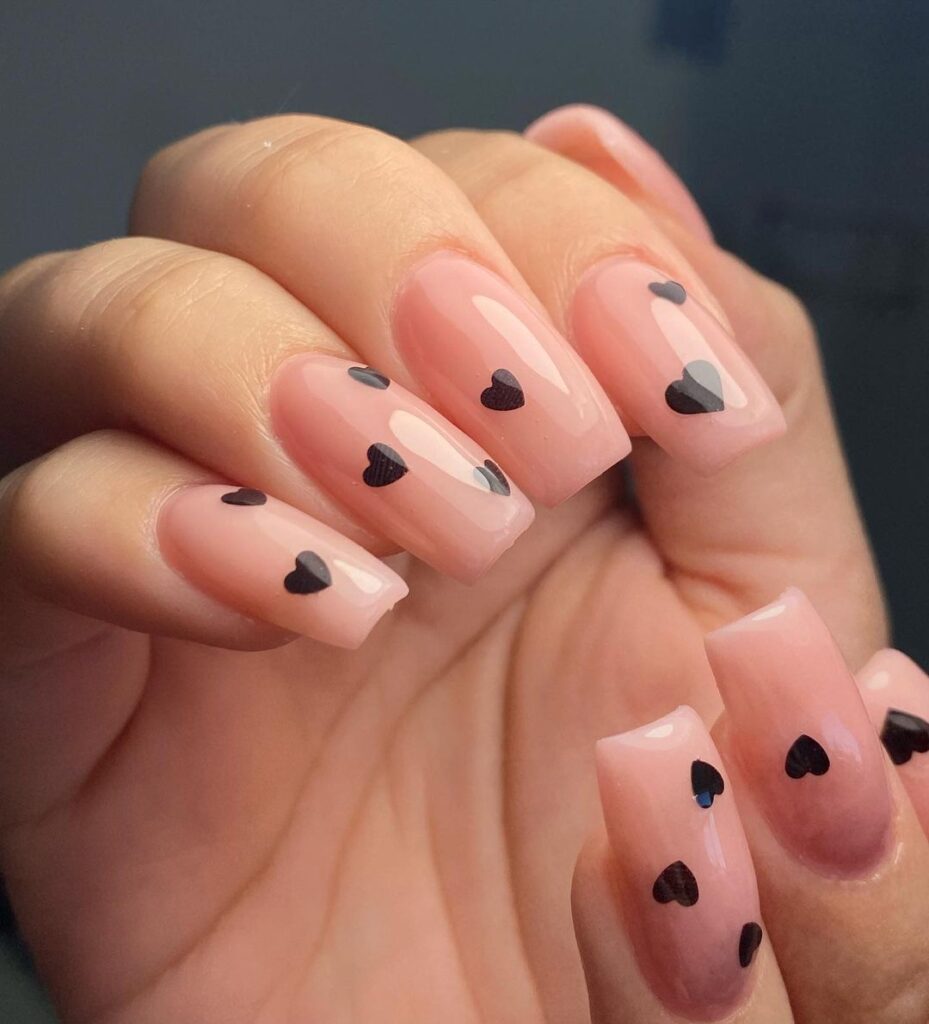
If you’re someone who is over the vibrant colors for the V-Day manicure, then this combination of black hearts on a nude base will impress you. To recreate, all you need is a soft pink translucent base for the dip nails and you don’t even have to put multiple layers to have the same sheeny effect. Once the polish is done, use the dotting tool to place the black hearts and cover them all with a glossy coat.
#19 White French Manicure With Red Hearts
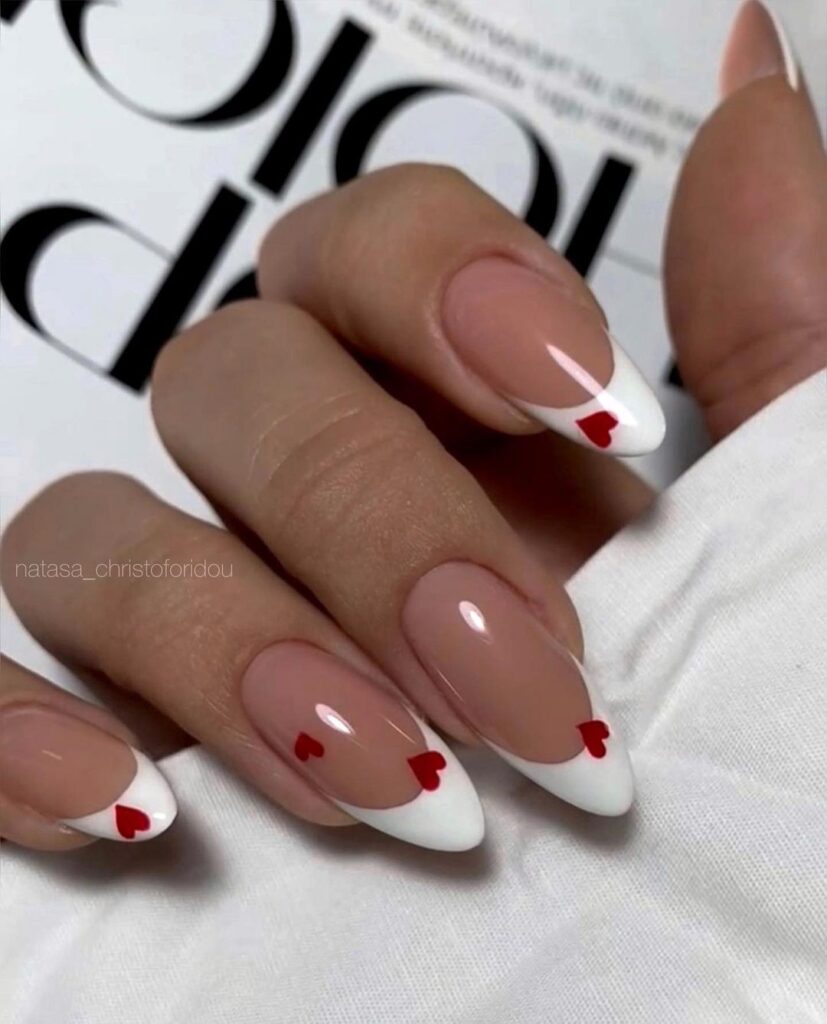
If you’re a fan of the classic white French manicure and don’t want to ditch your signature nail art for V-Day, then make them celebratory by including red hearts here & there. This dip nail designs for Valentine’s Day is elegant yet stylish enough to put you in the festive mood.
#20 Marble Dip Nail Design For Valentine’s Day
Marble nails are still going strong, and we love it. This eye-catching design is artistic and yet looks sophisticated at the same time. Though creative, they can be easily done at home with dip nail powders, and below a tutorial gives you step-by-step pointers on how to do them at home.
#21 Simple & Sophisticated
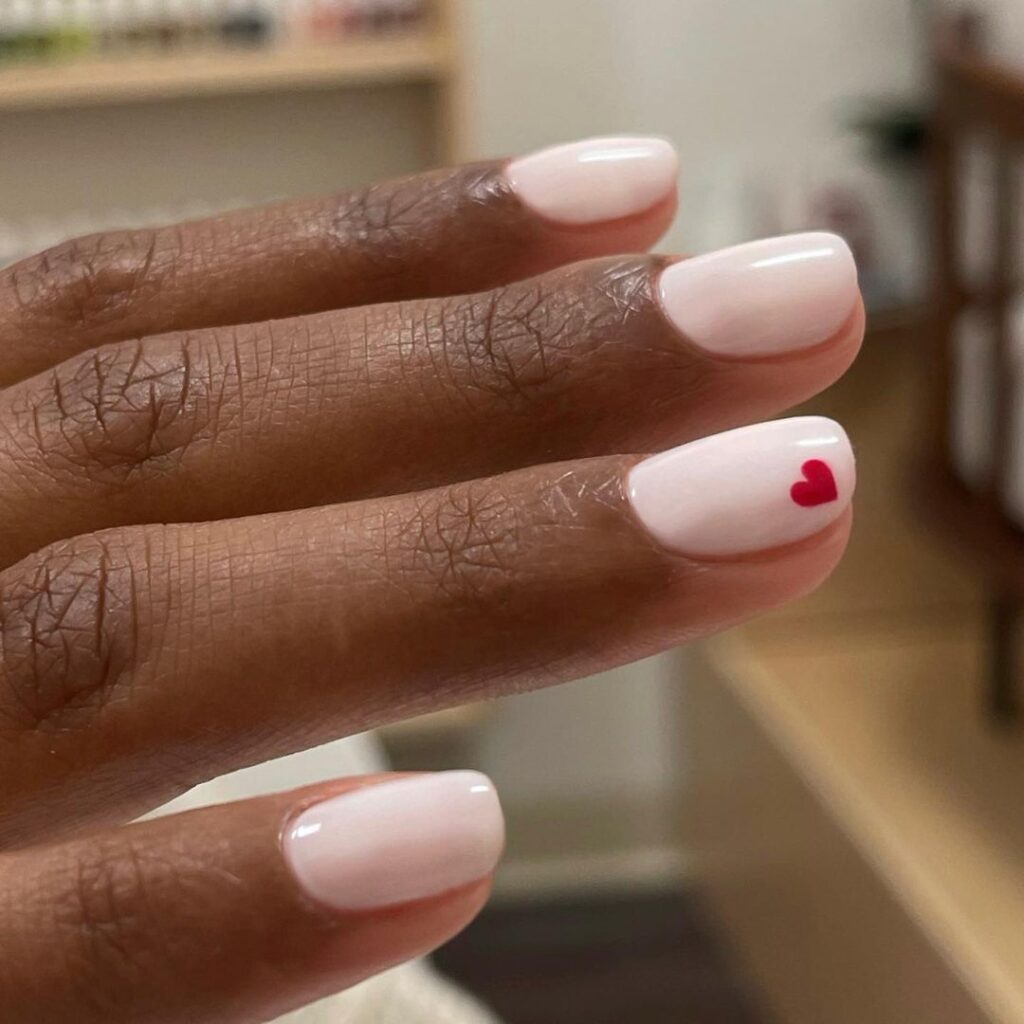
A nude pink base with a gloss coat is enhanced with a heart motif on the ring finger to signify the celebration of love! You can include the motifs on one hand, like done in the manicure below, or you can put these little heart stickers on all the fingers.
The exact nude pink shade is included in the set here.
#22 Always Winning In The Game Of Love
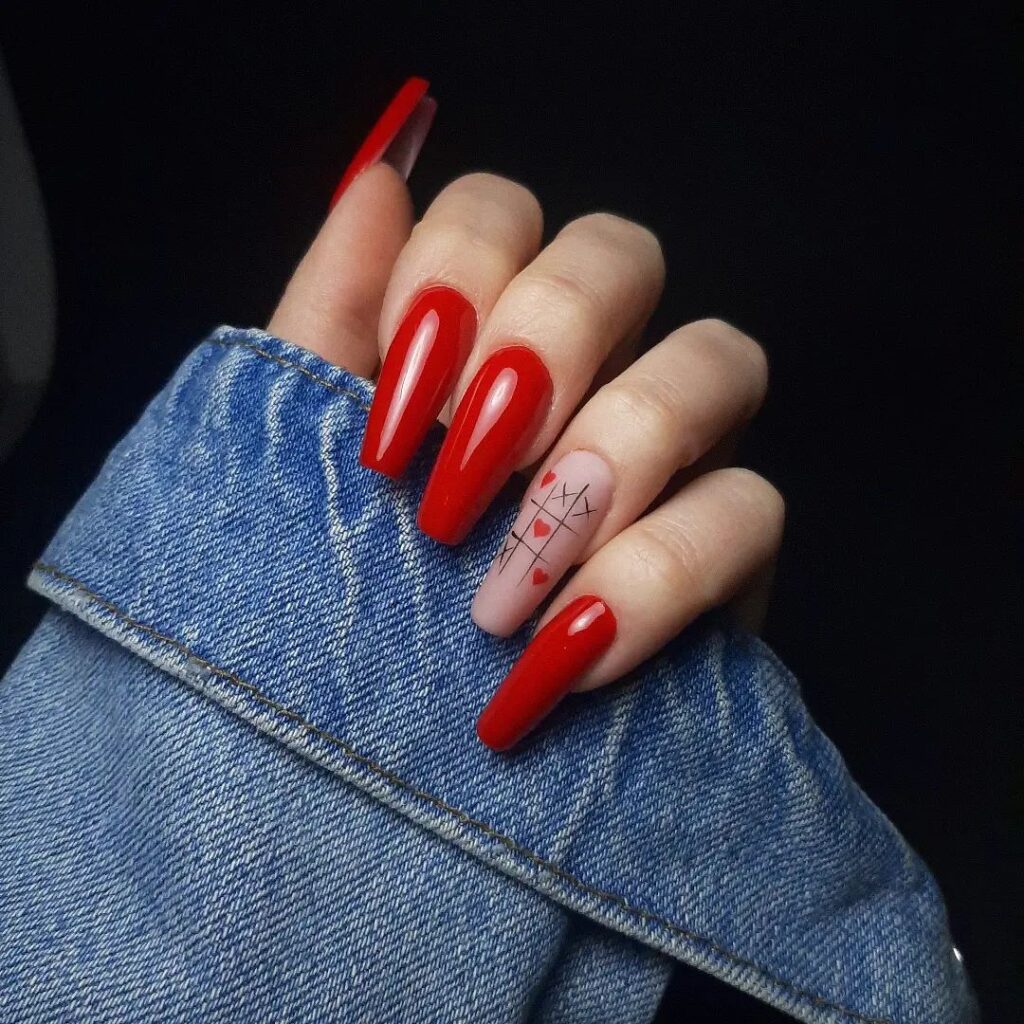
The heart motif takes an elevated turn with a tic-tac-toe featuring the hearts winning the game. For a creative motif like this, you will need longer nails so the element gets proper space to shine in the manicure.
Explore the range of eye-catching nail stickers for Valentine’s Day here.
#23 Heart Lines As An Accent
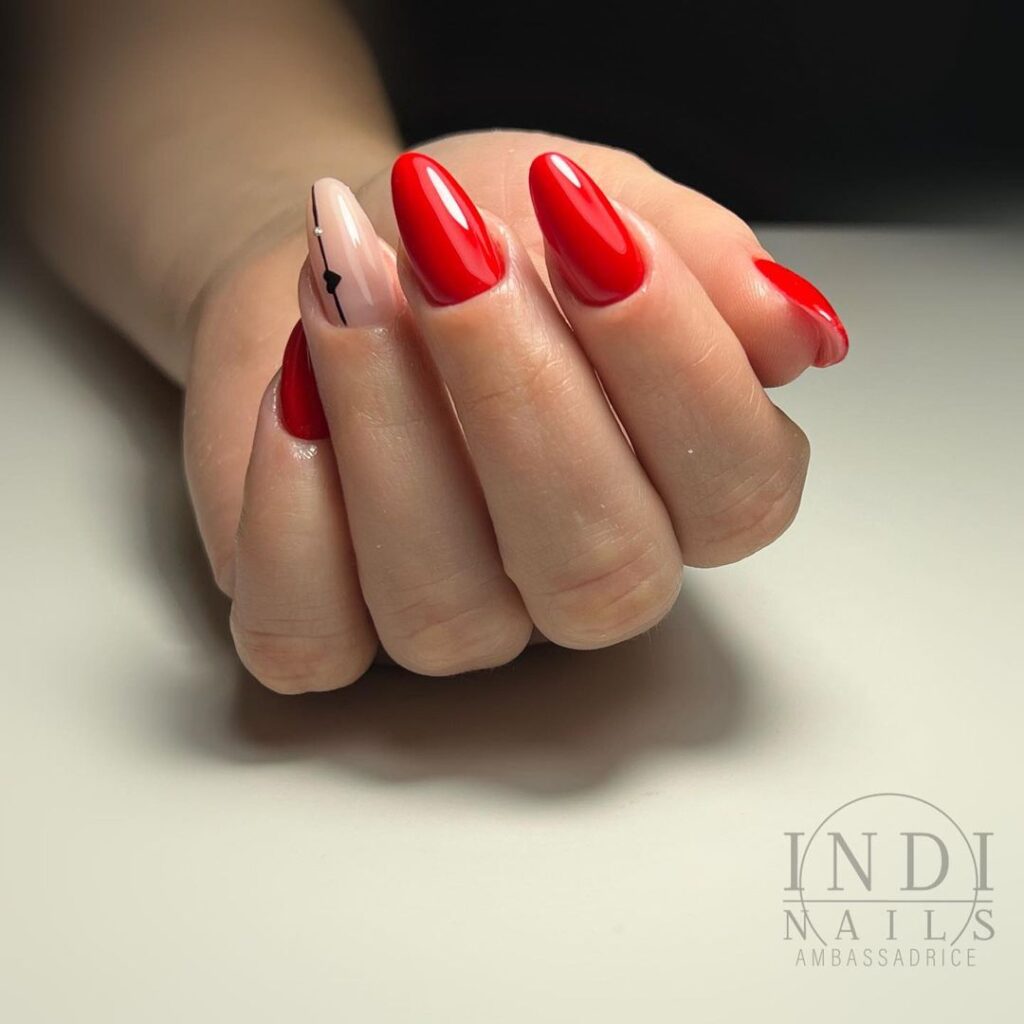
This one of the dip nail designs for Valentine’s Day featured cherry red nails with an accent nail created using a nude base and heart line. The element can be created using a dotting tool, or you can use a nail sticker as a convenient option.
#24 Heart Nail Tips For Valentine’s Day
The heart-tipped French manicure makes for an excellent idea for dip nail designs for Valentine’s Day. These are a classic take on the French manicure where the tips aren’t curved but are rather in a bowed heart shape, making them a perfect nail art idea for Valentine’s Day. Below, find YouTube Carole Annette portraying how to DIY this manicure at home with a detailed step-by-step visual representation.
#25 Combination Of Red & White
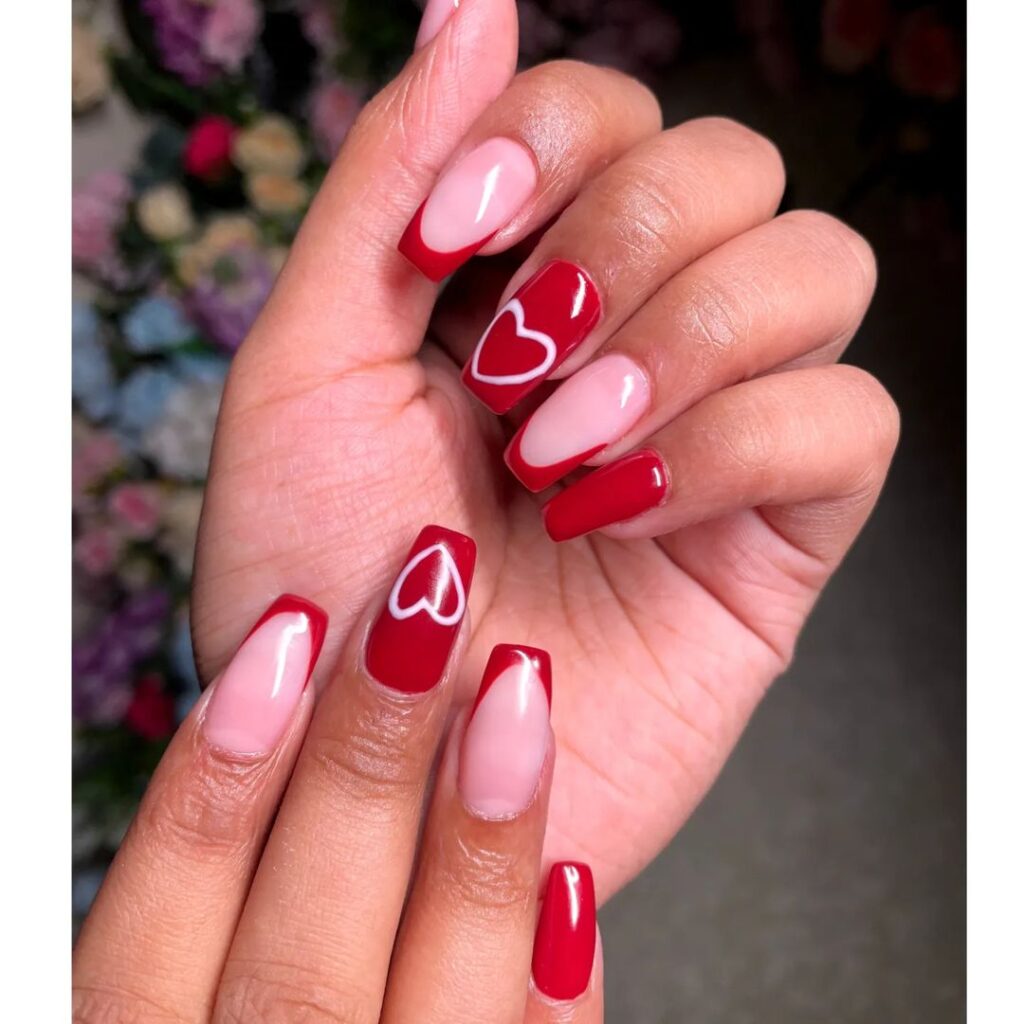
Fresh and edgy – with a touch of femininity is what sums up this last one of the dip nail designs for Valentine’s Day. It features a classic French manicure alternatively with block red color nails which are enhanced with heart motifs in white color for a winsome look.
Buy a set of dotting tools to create the heart motif here.
Dip Nails: What Is It?
Dip nails or dip powder nails or SNS (signature nail systems) nails are a type of manicure wherein a clear adhesive base is applied to the nails before dusting a pigmented powder onto them and finally using an activator so the color cures in the air. These nails have been around since the 80s and have gained traction with the DIY trends. The dip nails are also done at the salon, but many prefer to do them at home. These types of nails can feel more natural than acrylic but less natural than gel nails. Though, they have the lasting strength as much as the acrylic nails and when done correctly, can easily last for about two to three weeks.
Products In Dip Nails: Base Coat, Activator, Top Coat, & Brush Saver
#1 Base Coat:
Role: The base coat is applied to the nails before dipping in powder. It provides a foundation for the powder to adhere to and helps to protect the natural nails.
How to Use:
- Apply a thin, even layer of base coat to each nail.
- Immediately dip the nail into the colored powder, ensuring complete coverage.
- Tap off excess powder.
#2 Activator:
Role: The activator is used to harden the powder and bond it to the base coat. It helps in the curing process and provides a smooth, durable finish.
How to Use:
- After applying the powder, wait for a minute or two to let it set.
- Apply a coat of activator to each nail. It promotes the chemical reaction that solidifies the powder.
#3 Top Coat:
Role: The top coat is the final layer that adds shine, durability, and protection to the dipped nails. It seals and completes the manicure.
How to Use:
- Once the activator is dry, apply a thin layer of top coat to each nail.
- Ensure that the edges and tips of the nails are well-covered.
- Let the top coat dry completely.
#4 Brush Saver (Optional):
Role: Some dip powder kits come with a brush saver or resin that helps prevent the brush from hardening due to the activator. It extends the life of the brush and maintains its flexibility.
How to Use:
- If your kit includes a brush saver, apply it to the brush after using the activator.
- Clean the brush with the saver to prevent it from becoming stiff.
Additional Tips:
- Follow the specific instructions provided by the dip powder kit you’re using, as formulations can vary.
- Work quickly, especially with the base coat, as it needs to be wet when you dip your nails into the powder.
- Ensure each layer is applied thinly for even and smooth results.
- Properly seal the edges with each coat to enhance the longevity of the manicure
Dip Nails: Do’s & Don’ts
#1 DO Push Back The Cuticles
Pushing back the cuticles provides a smooth surface for dip nail powder, and prevents lifting. Start by soaking the nails in a warm liquid and using cuticle remover oil so the sides soften. Use the cuticle pusher or orangewood stick to gently push back the cuticles. After pushing back the cuticles and removing any excess, cleanse your nails with a nail polish remover or alcohol to remove any oils or residue.
#2 DON’T Excessively Buff The Nails
Excessively buffing the nails can damage the nail bed, weakening it, and hence causing the dip nails to lift or last for a shorter amount of time. To buff the nails, use a gentle buffing block with a smooth surface. Remember the goal is to create a slightly roughened surface for the dip powder to adhere to, not to thin or weaken the natural nail.
#3 DO Dehydrate The Nails
Dehydrating the nails is a necessary step and involves applying a solvent that dissolves any small amount of moisture, fat, and bacteria from the nail bed. This simple nail prep provides a cleaner surface so the polish bonds better on the nail surface.
Note: Dehydrators are different from primers as the former acts as a cleanser while the latter is just an adhesive that helps join the product to the nail.
Try these acid-free dehydrators: Option 1 || Option 2
#4 DON’T Apply Primer
The activator and the adhesive base liquid of dip nails come with primer and don’t require this additional nail prep to help adhere the polish to the base. You can skip the primer completely.
#5 DO Put Thin Layers
You might think putting a thicker adhesive base will automatically mean the powder will stay longer and better. But it’s just a recipe for lifted and thicker dip nails, which won’t look good aesthetically and also last for a shorter time. Instead, put thin layers of both liquids to create durable and beautiful dip nail designs for Valentine’s Day.
#6 DON’T Put Thick Layers
This step needs repetition. You need to put 2 to 3 thin layers of base adhesive and activator, rather than thicker layers so the powder stays and cures beautifully, and the manicure also lasts longer.
#7 DO Dip The Nails Quickly After the Base Coat
Dipping the nails quickly is necessary to ensure proper adhesion. The quicker you will be, the better the powder attaches to the base adhesive. To keep things smooth, keep the powders open in a plate and apply a thin layer of the base before you promptly put the nails in the plate.
#8 DON’T Let The Base Coat Get On Your Skin
If the base coat gets on the skin, the powder will get attached there too which can prevent a smooth base from forming, resulting in a lifted manicure.
#9 DO Seal The Edge Of Nails
Capping the edge of the nails means you paint over the edge of the nails so the polish looks smooth and creates a chip-free resistant finish. Seal the edge of the nails when you’re applying the base adhesive, activator, and top coat.
#10 DON’T Use Too Much Activator
Using too much activator in a dip nail application can lead to over-hardening and a compromised final result. Activator is designed to cure the resin and harden the powder, and an excess amount may cause the nails to become brittle, impacting the overall quality and longevity of the manicure.
Conclusion:
Dip Nail Designs for Valentine’s Day are easy DIY manicures but do need some practice and patience. The trick is to start slow, get acquainted with the necessary tips, and try on a simpler design. A simple nude manicure with a glitter nail accent or metallic polish with a heart sticker can be the best picks. Follow the video tutorials if you want to try an ambitious manicure at the beginner stage. Valentine’s Day is a joyous and love-filled occasion, so follow your heart and pick among these 25 dip nail designs whatever seems fit at the moment.

