A Yogic will tell you – there’s a yoga pose for every problem, and they aren’t joking! From building muscular strength to tackling depression or healing common disorders like PCOS or migraine, yoga poses act as a salve for any mental or physical issue. And they have beauty benefits too. Most yoga practices involve slow, steady exercises with controlled breathing and muscular control which increases blood flow and balances hormones. This can show effect on your skin almost instantly and on your hair, after around 3 to 4 weeks of consistent practice. If you’re a bride-to-be, practice these yoga poses for 10 to 15 minutes daily or incorporate them into your workout routine as relaxation and stretching. Here are the 10 best yoga pose for glowing skin and hair.
#1 Kapalbhati
Kapalbhati pranayama is a powerful breathing technique that helps the body assimilate more oxygen, improves blood circulation, and promotes cell growth and regeneration, thereby helping your hair and skin look the best they have ever been! Kapalbhati also stimulates the abdominal muscles and supports a healthier gut. Gut health plays an important role in both skin and hair health. A gut balance helps in the smoother release of nutrients like biotin, B12, and collagen which is essential for cell repair and hair follicle growth.
Regular practice of kapalbhati also energizes the mind, reduces stress, and promotes mental clarity. It also increases lung capacity and regulates the breath so you can focus more on proper breathing throughout the day and the fresh oxygenated blood keeps reaching all your body parts, including the skin and hair.
How To Perform Kapalbhati:
- Sit in a comfortable cross-legged position. You can take the help of a wall to keep your spine erect, but it’s recommended to not take much support when you practice Kapalbhati.
- Relax your shoulder and place your hands on your knees, palms facing upward. Take a deep inhalation to prepare.
- Exhale forcefully through the nose as you contract your abdominal muscles and push the breath out in short bursts. The exhalations should be active and forceful, while the inhalation should happen naturally with the abdominal muscle expanding with every inhalation.
- Repeat the forceful exhalation followed by passive inhalation for 10 to 20 round initially and then, increase the number to 50 to 60. You shouldn’t do more than 60 of these rounds in one go. Take breaks and do this breathing exercise for 5 minutes or so!
#2 Ustrasana (Camel Pose)
Camel pose is one of the best yoga poses for glowing skin and hair, and a flat tummy as well! It’s a deep and intense back bend and should be done with care. For those who don’t have enough flexibility in their upper body, focus on the stretches for the upper body before trying this yoga pose. Initially, you might not be able to hold this pose for more than 10 to 20 seconds. Even at the advanced stage, it’s recommended to hold this pose for around 60 seconds before releasing.
Camel pose strengthens the chest, abdomen, and quadriceps muscles, and stretches and tones the glutes and hamstrings area! It’s great at opening up the chest and increasing lung capacity. Since this is a heart-opener pose, it’s amazing at releasing negative emotions and bring the peaceful emotional balance back to your life. You can practice this 2 to 3 months before the wedding to control those pre-wedding jitters.
How To Do Ustrasana Step-by-Step:
- Start by kneeling on your mat with your knees hip-width apart. Place the hands on your hips, fingers pointing towards the floor.
- Engage the core muscles and lengthen the tailbone to create a stable foundation.
- Inhale, lift your chest, and gently arch your back, starting from the lower back and gently engaging your mid-back and upper back.
- Reach your hands back to hold onto your heels and form a comfortable grip. Try to maintain the balance by allowing your head to drop back and keeping the thighs vertical.
- Take deep, steady breaths and hold the pose for a few breaths before releasing.
#3 Uttanasana (Standing Forward Bend)
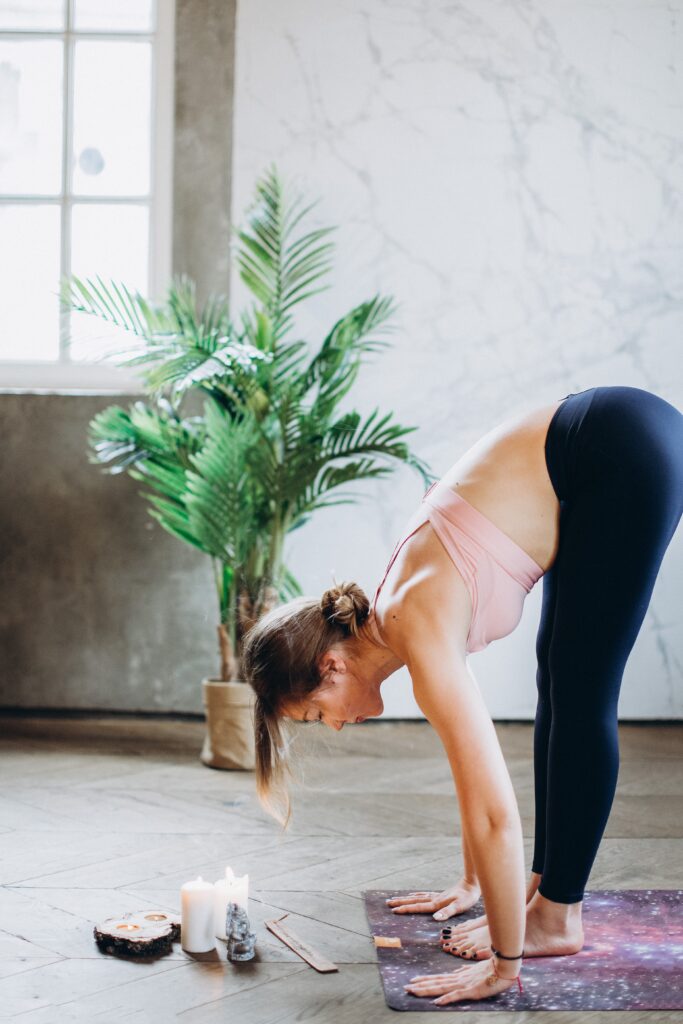
Uttanasana, also known as standing forward bend or intense forward bend, is an inversion pose that’s a great yoga asana for building flexibility while calming the mind. It’s a deeply-satisfying full-body stretch that helps loosen the hamstrings, stretches the spine, and lengthens the calves. It also releases tension from the back and neck, which is the most common area where people hold stress. The asana is great for boosting blood flow to the scalp so it receives the necessary nutrients to make your hair long and shiny, making it the best yoga pose for glowing skin and hair.
Not everyone has the flexibility to practice a full Uttanasana initially and you can practice three variations initially. First is bent knees Uttanasana where your knees are bent slightly bent but you still feel that stretch in your hamstrings. Second is a wide-legged forward bend where your legs are spread around 3 to 4 feet and the feet are parallel but the heels are slightly turned out. Now, you can bend and keep your hand on the floor or wrap it around the ankle whatever is comfortable. The third variation is half forward bend pose or Ardha Uttanasana where your hands touch the floor rather than the legs and you lower your spine as much as you can!
How To Do Uttanasana Step-by-Step:
- Start by standing tall and keep your feet closer together so there’s a thumb-print of space between the legs.
- Exhale and soften your knees slightly and fold forward from your hips. Allow your upper body to hand freely, relaxing your head, neck, and shoulders.
- Depending on your flexibility, you can either do a variation of the pose or bring your palms to the floor beside your feet. Advanced level involves curling the hands around the calves whilst keeping the spine straight.
- Inhale and lengthen your spine. Exhale and allow your upper body to relax deeper into the pose, releasing any tension from any areas of the body.
- Engage the thigh muscles. You can also slightly bend the knees to provide more stability in the pose. If it feels comfortable, you can also sway gently from side to side or walk your hands from one foot to the other.
- Hold for at least 20 to 30 seconds before releasing and slowing rising back up to the standing position.
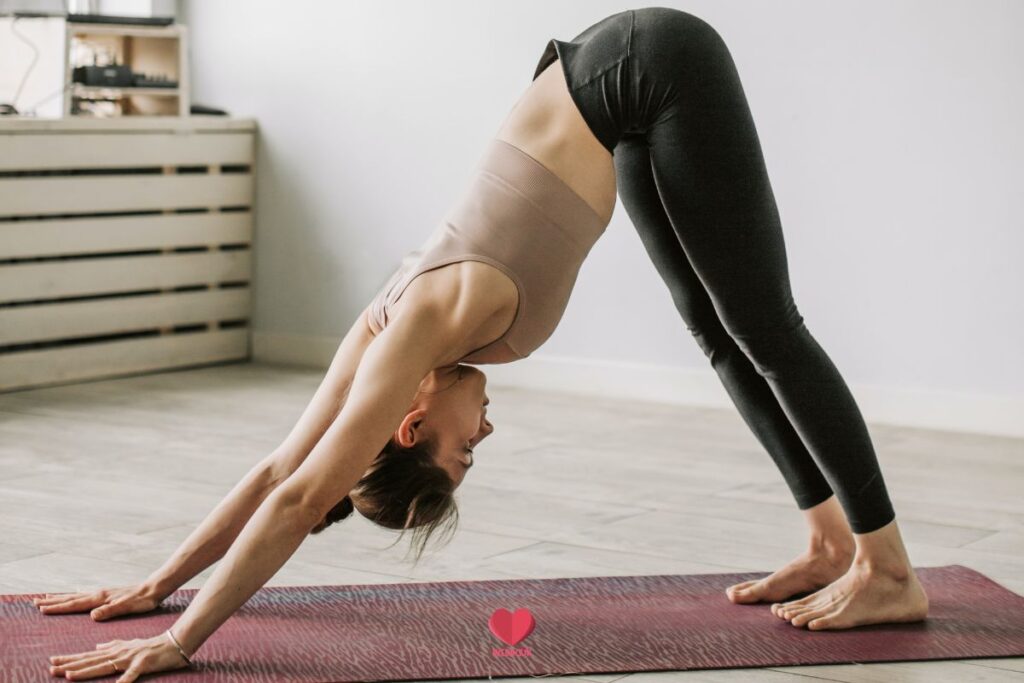
#4 Adho Mukha Svanasana (Downward Dog Pose)
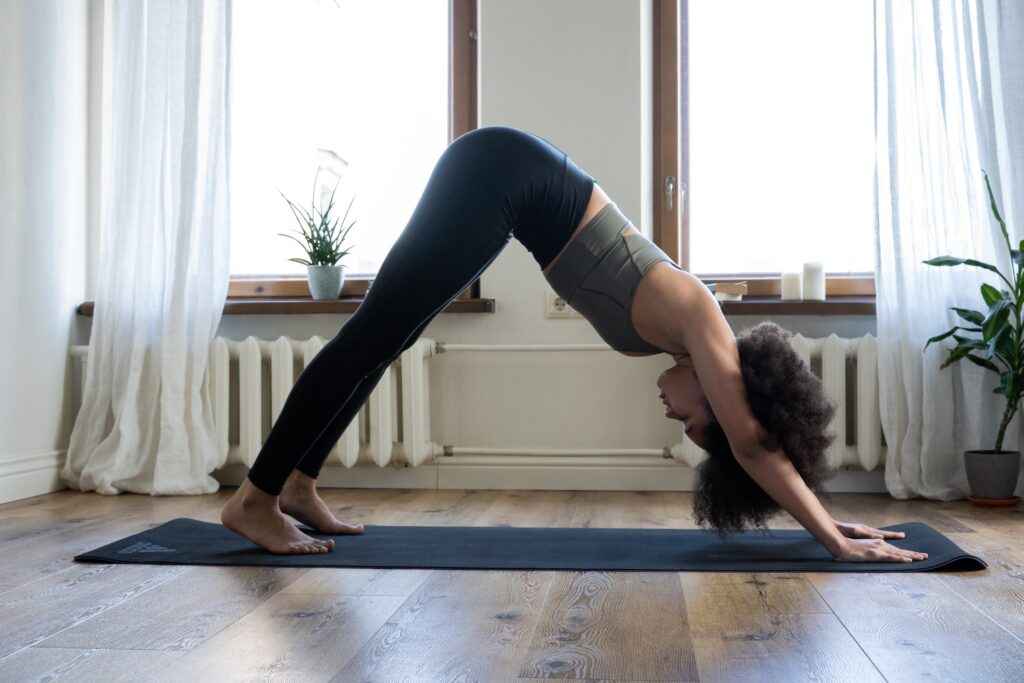
Adho Mukha Savasana is the perfect yoga pose for glowing skin and hair to practice at the beginner stage. It has very less chances of any injury or straining any muscles and you will feel tons of stretching in your calves, hamstrings, and hips. The pose also strengthens the arms and improves the blood flow to the brain. Just a minute of holding this pose and you will see those red, flushed cheeks and a smooth glow all over your face.
Adho Mukha Svanasana is a rejuvenating pose that makes you feel refreshed instantly. It’s also a great stretching exercise and can be incorporated into your existing workout routine easily. This asana is equal parts stretching and strengthening. It tones the whole body and also increases your stamina. If you have a weak upper body, this asana can be a struggle at first and we won’t recommend holding for more than 10 to 20 seconds. As the strength builds, you can hold the pose for about a minute!
How To Do Adho Mukha Svanasana Step-by-Step:
- Start on all fours with hands and knees on the floor and feet slightly above the ground. Spread your fingers wide and press them firmly on the mat.
- As you exhale, lift the knees off the ground and extend the hips upward. Straighten your legs as much as you’re comfortable with, but even a slight bend in the knees is okay for beginners.
- Press your shoulders actively inward and keep your gaze towards the knees. Engage the core muscles and draw your belly button towards the spine to support your lower back.
- Lengthen the spine and while your legs don’t have to be straight, your arms should form a long, straight line.
- Allow your hand and neck to relax. You can press the heels toward the ground, but they don’t necessarily have to touch in the beginner phases.
- Focus and take 8 to 10 deep breaths before releasing. You can also set a timer to hold the pose for however long you deem comfortable.
#5 Urdhva Mukha Svanasana (Upward-Facing Dog Pose)
Urdhva Mukha Svanasana is often confused with Bhajungasana, but they both are done differently and put pressure on and stretch different parts of the body. While the former works mostly on the neck, spine, and shoulder, the latter also puts pressure on the hips, lower back, and pelvis. The Urdhva Mukha Svansana is a back-bending asana that stretches the neck, opens the shoulders, and strengthens the arms and wrists.
It’s believed that this one of the yoga poses for glowing skin and hair works directly to promote lymphatic drainage, which removes waste and toxins from the body. This attribute itself gives your skin a glow and helps the proper flow of nutrients to reach your hair follicles, which, in turn, promotes hair growth and reduces hair fall.
How To Do Urdhva Mukha Svanasana Step-by-Step:
- Begin by lying face down on your mat with the tops of your feet resting on the ground.
- Place your hands on the mat next to your lower ribs, fingers spread wide and pointing forward. Your elbows should be slightly bent and closer to the body.
- Inhale deeply and press firmly into your hand as you left your chest above the ground and form a soft bend in your back.
- Keep your gaze forward and press the tops of the feet and the legs onto the mat to keep the position intact. Avoid clenching your buttocks.
- Hold the breaths for several minutes, breathing deeply and evenly. Allow your chest to expand, maintaining an open and lifted posture.
- Release the pose with an exhale and gently roll your head forward whilst lowering the body back down to the mat.
#6 Setu Bandhasana (Bridge Pose)
Setu Bandhasana or bridge pose is an inverted, back-bending asana that directly puts your head below your chest boosting fresh oxygenated blood to your face and your hair follicles. Who knew glowing skin was just a minute of bridge pose away? Yes, practicing this yoga pose for glowing skin and hair needs just a minute of your day to experience the benefits. You can put the timer for 30 seconds initially and do it in two sets, but as your body adjusts, holding the pose for 1 minute with soft breaths is recommended!
Bridge pose directly works on your hips, thighs, spine, and neck, and gives them a good toning and stretch instantly. This yoga asana is also amazing to calm your brain, reducing anxiety, and relieving you from stress. Stress is the worst for your skin and hair, and with the wedding nearing, pre-wedding jitters are common. The bridge pose boosts blood flow to the brain and makes you feel calm instantly. Practicing it just before bed also ensures quality shut-eye by promoting relaxation.
How To Do Setu Bandhasana Step-by-Step:
- Start by lying flat on your yoga mat and bending your knees. Place your feet hip-width apart, ensuring that the heels are close to the sitting bones.
- Keep your arms alongside your body, with your palms facing down and fingertips slightly grazing the heels.
- Inhale and lift your hips off the ground. Engage the leg muscle and ensure that your feet are pressed firmly into the mat.
- Roll your shoulders and keep your arms facing down.
- Lift your chest slowly so the chin is tucked slightly towards your chest. Keep your neck relaxed so there’s no extra pressure.
- Stay there for 30 seconds to a minute, gently breathing throughout. To release, slowly roll your spine back down onto the mat and rest.
#7 Surya Namaskar (Sun Salutation)
Surya Namaskar or Sun salutation is a popular yogic kriya consisting of 12 powerful yoga poses done in a flowing manner. It’s supposed to be done during sunrise to pay your respects to the Sun and harness its energy. The Surya Namaskar is a comprehensive workout that tones the body, improves flexibility, enhances blood circulation, and promotes mindfulness.
A common sequence of 12 postures includes prayer pose, raised arms pose, standing forward bend, low lunge, plank pose, eight-limbed salute, cobra pose, downward-facing dog, low lunge, standing forward bend, raised arms pose, and prayer pose. You have to repeat the sequence, alternating the forward leg in steps 4 and 9, to complete a full round of Surya Namaskar. It is often recommended to perform multiple rounds, gradually increasing the number as you build strength and stamina. It’s also recommended to practice the Sun salutation mindfully, listening to your body, so you can reap both the physical and mental benefits of this ancient practice.
According to Ayurveda, Surya Namaskar is one of the most powerful yoga practices to balance the three doshas: vata, pitta, and kapha. The tridoshic balancing leads to an individual being in perfect health – physically, emotionally, and mentally. If you’re a bride-to-be who wants to tone down before the wedding while reaping the skin and hair benefits of yoga, you should start doing at least 5 surya namaskars a day and gradually increase this number!
#8 Trikonasana (Triangle Pose)
Recommended by Malaika Arora for healthy skin (something she practices daily too!), Trikonasana opens up the shoulders and hip flexors, helps with lymphatic drainage, and opens up your chest and lungs to give your skin a beautiful glow and promotes circulation in the hair follicles. “Trikona” means three corners in Sanskrit and this yoga pose for glowing skin and hair is named so because the final posture resembles a triangle formed by the upper body and lower body.
Note that people with lower back issues and reduced shoulder mobility shouldn’t practice the triangle pose. If you have difficulty getting into the triangle pose then do a transition sequence involving reverse warrior or half-moon before getting into the final posture. Though it’s a good yoga pose for glowing skin and hair, you should take your time to get comfortable with it.
How To Do Trikonasana Step-by-Step:
- Stand with your feet about 3 to 4 feet apart and parallel to each other.
- Turn your right foot to the right side with the heel aligned with the arch of your left foot.
- Inhale and raise your arms parallel to the floor keeping them in line with your shoulder and palm facing down.
- Exhale and bend your torso to the right, directly over your right leg. Take your time here.
- Now, place your right hand on the floor right next to the heel of the right foot and extend your left arm towards the ceiling. Turn your head to gaze at your left thumb.
- Stay here for 30 seconds to a minute and repeat on the other side.
#9 Bhajungasana (Cobra Stretch)
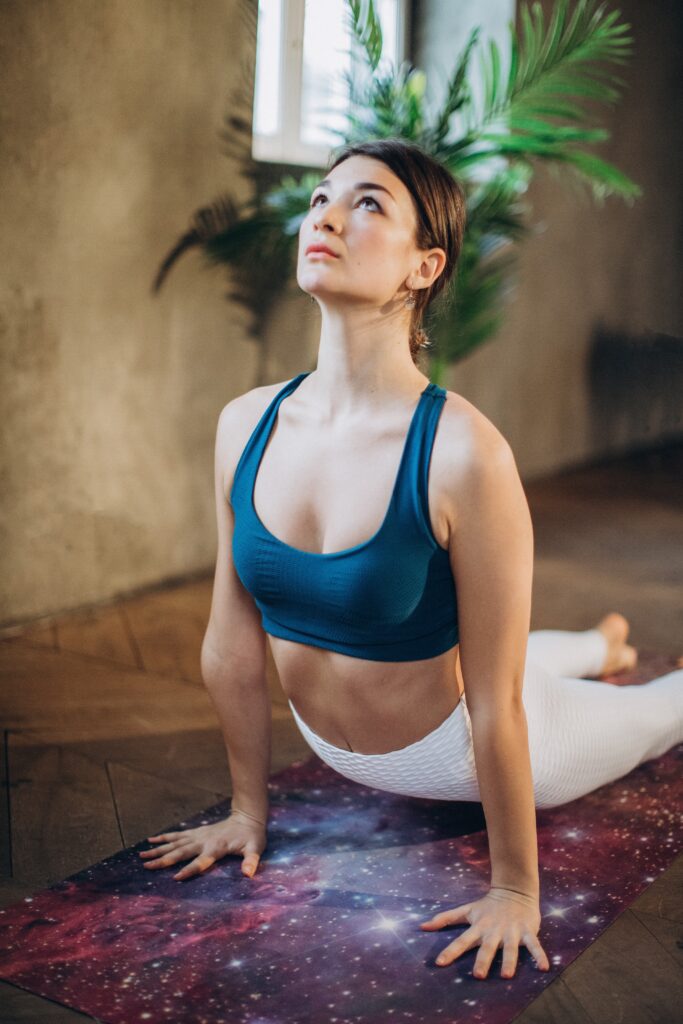
Bhajungasana is a backbend stretch and all backbend stretches help to open up the front part of the body, improve hip flexibility, lengthen the spine, and promote good posture. Bhajungasana or cobra stretch is often done as a cycle within yoga poses or a transition like Surya Namaskar or downward dog. But this asana is a complete asana in itself as well and the gentle bend is known to heal both the body and the mind.
Bhajungasana is a great yoga pose for glowing skin and hair, plus a flat tummy as it tones the abdomen and also detoxifies the gut. Though, this asana should be avoided by those who have severe back or neck problems as it puts a lot of pressure on these areas. Bhajungasana is also a beginner’s pose and can be practiced by brides who have no experience in yoga.
How To Do Bhajungasana Step-by-Step:
- Start by lying flat on your stomach with your legs extended behind you and the tops of your feet pressing on the floor.
- Position your elbow close to the body, hugging your upper arms against your side. Relax your shoulders.
- Inhale and gently begin to lift your head, chest, and lower abdomen off the mat. Use your back muscles rather than your arms to lift.
- Keep your pelvis and lower body grounded, pressing the tops of your firmly into the mat.
- Straighten the arms, but do keep a slight bend in your elbows. Open your chest and allow your gaze to be forward or upward as is comfortable for your neck.
- Maintain the pose for a few breaths and let go. Repeat 4 to 5 times every day to experience the skin and hair benefits of this yoga pose.
#10 Matsyasana (Fish Pose)
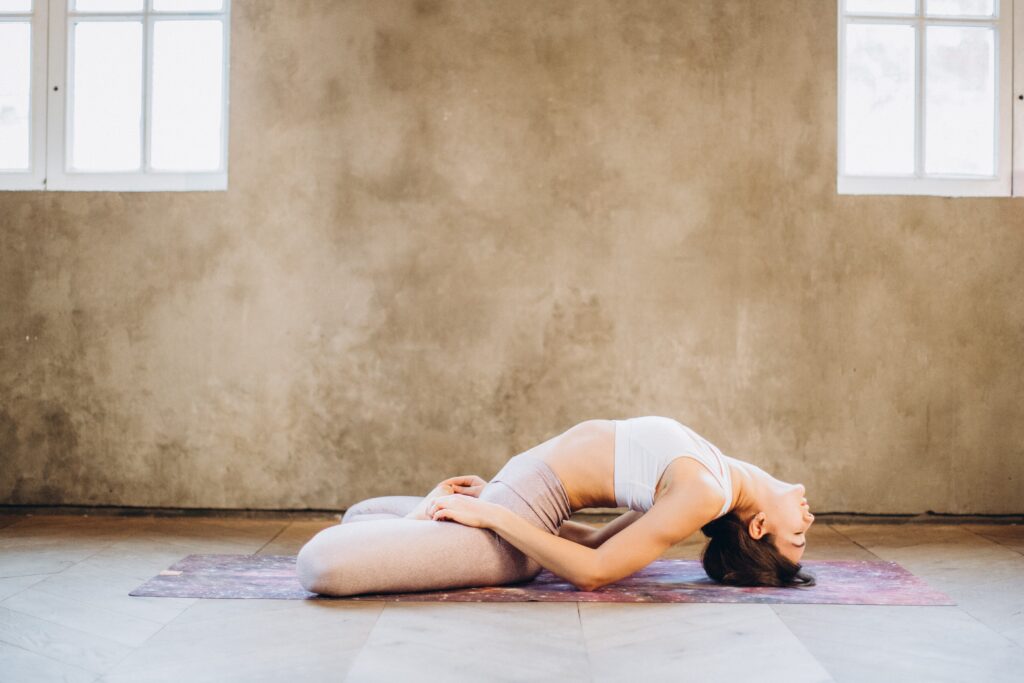
Matsyasana is one of the best yoga poses for hair growth, glowing skin, and a flat tummy. Matsya means fish in Sanskrit and the asana is called so because it resembles fish at the end of the posture. In traditional texts, Matsayasana is described as the destroyer of all diseases and is recommended for ailments and conditions like thyroid, asthma, constipation, arthritis, and auto-immune disorders.
Also called the fish pose, this asana expands the chest, strengthens the spine, and reduces stiffness in the muscles around the cervical, thoracic, and lumbar regions. It also restores bone density and is a counterpose to the intense forward bends and is often practiced after shoulder stand (Sarvangasana). This yoga pose is also a great stress reliever and reduces DHT blockers. Practicing it for 1 to 2 minutes every day is the secret to long, healthy, and voluminous hair!
How To Do Matsyasana Step-by-Step:
- Start by lying flat on your back on a yoga mat or a comfortable surface. Ensure that your legs are folded and actually together.
- Place your hand underneath your hips with palms facing down. Your forearms and elbows are tucked closer to the sides.
- Inhale and press your forearms and elbows into the mat while lifting your upper body off the ground creating a soft arch.
- Gently lower the crown of your head and keep the neck relaxed to prevent injury. If you’re a beginner, don’t try to push the arch and keep it at a smaller curve.
- Hold the pose for a few breaths and release. You can repeat, but if it’s your first time slowly increase the repetitions rather than doing them back-to-back at once.

